Wednesday, May 30, 2012

Plant Extravaganza

We hit the town plant sale held by the Garden Club, and we managed to score some plants, though not as many as I’d hoped to get. I was looking for tomatoes, and they had a few, but they seemed to be more focused on decorative and landscaping plants. There were a few tomatoes, but they had some of the gourmet heirloom variety which I wanted to avoid. I really wanted just two types: beefsteak (or some facsimile thereof) and canning tomatoes, which I’ve been told are plum or roma tomatoes.

They only had beefsteak at the sale, so I got one. Now I also wanted to avoid cherry tomatoes. Though they can be fun, when we’ve planted them in the past, they overwhelm us because we can’t eat them fast enough. Plus, I get a little tired of them. Of course, being the sucker that I am for a sales pitch, CS talked me into getting an heirloom variety (wasn’t I trying to avoid that?) that supposedly produced heart shaped tomatoes. This excited the kids and they convinced me that we needed one. They also picked out a plant for themselves, and it’s kind of cool. It’s called an Elephant Ear, and it looks like, of all things, an elephant’s ear. Can you tell which one it is? It’s actually a tropical plant bulb, so we’ll have to bring it inside once summer is over.

After the sale, I headed over to the Clay Hill farmstand and got some more tomato plants, ending up with 6 in all. I could probably use more, but it’s a start. CS told me that some of them will grow to be 5 feet tall, which is hard to imagine, but she knows what she’s talking about. I asked about herbs and bush beans, which N wants in his garden, and she told me that herbs you can get at the Coop, and beans should be started from seed and planted right now. Live and learn.

All in all, we did okay on the plant front, but there’s always room for more. Until the next time, thanks for reading.

Monday, May 28, 2012

Back in Business

I got my chainsaw back, and I’m ready to rock and roll. It’s a busy time at Joe’s, so it took over two weeks to service the saw. Now all my good planning is out the window because I missed out on the cool spring weather. It’s getting warm, but not excessively hot, though some days it tops out in the mid-80s, which makes it somewhat uncomfortable to cut wood because of all the protective gear. Not that I, as a real-man in training, would ever whine about such a thing.

I have about 20% of the wood pile cut, so there’s plenty of work to be done. My original plan of moving the already cut blocks while the saw was in the shop failed miserably, but that doesn’t mean I can’t start moving the wood now, right?

Until then, thanks for reading, and thanks to mil_es for the pic.

It’s Official, Sort Of

Even though we’re well into spring, with signs even of summer, I like to think of the end of the cold season as the day that we stop burning wood, and the sooner, the better. In years past we burned wood well into June. This year, we had a mild winter, and spring has been warm, so we stopped burning wood in mid-May. In fact, for the first time since we started splitting wood, we actually have wood left over from the previous winter. That’s a first. Either we’re planning better, or just not burning as much wood. Again, we had a mild winter with little in the way of snow, but it was still cold. It doesn’t take much in terms of cool weather for the house to be cold, and even though we’ve stopped burning, there’s a slight chill when we get up in the AM. Nothing real New Englanders (in-training) can’t handle.

Also, they recommend delaying planting tomatoes until June 1, and I’ve heard this from several sources, because we can still get a cold snap. Enough to stunt tomato growth. I find it difficult to fathom, but again, several people in the know have alluded to this. Who am I to argue?

Either way, it makes my morning routine that much easier when I don’t have to build a fire, even though I like it... a lot. Plus, it’s nice waking up and walking around in shorts and a t-shirt. You can’t pull that off in January. For now, we’ll make the most of the warm weather, because in a matter of days I’ll have to start cutting wood for next winter.

Until the next time, thanks for reading, and thanks to sjb4photos for the pic.

Friday, May 25, 2012

Container Gardens

It’s hard not to completely avoid the gardening bug when you live up here, or maybe it’s just being surrounded by gardening commandos, of which there are plenty in our area. Whatever be the case, once spring kicks into full gear, the urge to get your hands into soil is hard to resist.

Now we decided not to do our garden for assorted reasons, and instead opted to do the community garden for other assorted reasons. The idea of doing container gardens also came up, and my first thought was “no thanks.” It seems like you would need either a lot of containers, or a few big ones. Would that mean buying them and then having to deal with them? While I tend to bite off more than I can chew, I wasn’t so keen on taking this one on. However, R and the kids mentioned the desire to do at least something around the house.

Then A came home with some lemon thyme, and wanted to transplant it. This inspired us to grow some herbs at home, and in container gardens, no less. I’m not completely clear what sort of containers are required, but it’s one of those things I probably shouldn’t over-analyze. Yeah, right.

It just so happens that we had a bunch of scrap wood in the barn, and I was a little unsure as to how to dispose of it. It was a support beam for the second story floor, of all things, so you can imagine its size. KB replaced it with a strong support, making it easier to do the sheetrock and also enabling him to remove a column that was in the middle of the floor. The only issue was, what to do with the old one? KB said to cut it up with a chainsaw and burn it, which I was prepared to do, but the wood was in decent condition.

The beam was made of two 2X8 boards that were nailed together. If I wanted to use them, I was going to have to pry them apart, which was no easy task. I had to use two crow bars simultaneously. Once that was done, I had boards that could be cut and then made into square boxes. In these we could grow our herbs. The beauty of this plan is that it also helped to clear some space in the barn. One less piece of clutter.

I screwed the sides together using 3.5 in screws, glue and long clamps (which I’m finding to be amazingly useful in the construction of wood furnishings), then put in a bottom, and we were good to go. The boxes are a bit heavy, but they should work fine. We have the monster bag of potting soil, so I think we’re good to go. The next step will be to transplant the herbs, and watch them grow.

Until then, thanks for reading.

Tuesday, May 22, 2012

Chainsaw Woes

This bums me out to no end, but I was having chainsaw issues, and it turns out it’s kind of serious. We’re talking in the $150 dollar range of serious. I may have mentioned this in the past, but when I release the trigger of the saw, the chain doesn’t stop. This happens only after I’ve used it for about half an hour, so it’s not an idle adjustment issue, which would occur even when it’s cold. I took it in and they said it’s an air leak, which means taking the entire machine apart, resealing it, and then putting it back together. The saw itself probably cost about $400, so it’s a painful fix.

That does not mean, however, that it’s time to get a new one. As much as it pains me, I told them to fix it, because we need the saw, and it surely has many more years of life on it... I hope. When I first shopped around for chainsaws, I knew nothing, and listened to everyone around me who said get a Stihl or Husqavarna. The key seemed to be to get one that you can’t pronounce. Nobody really endorsed the Japanese brands, and I took that to heat. In retrospect, however, I wonder if Japanese was the way to go, because they may not have as much personality, but they are famously reliable.

Now if the Japanese brands were cheaper, I probably would have gone for it, but the one I looked at, Shindaiwa, was not, and I’m not sure how much Echos are. Either way, I went with Stihl, and it’s a nice saw, but maybe it’s like VWs, performance oriented but not necessarily the most reliable.

Oh well, no sense in dwelling on what’s already been done. If I ever got another saw, however, I might consider a Pacific Rim variety.

Until the next time, thanks for reading.

Monday, May 21, 2012

Inserting a Bathroom Window

The electric cable is in, and the walls have all been framed. The next step will be to install heating, finish the plumbing, and then insulate. In the meantime, I want to have a window installed in the downstairs bathroom, and I think it’s something I can do. Ha, famous last words. I figure since KB is nowhere to be found, there is down time where I can do some stuff. Think of how impressed he’d be if I pulled this off, and how proud my Mentor would be.

The situation is complicated by the fact that the walls are sheathed, so I have to either remove the sheathing, frame the window, then re-sheath, or cut out a section of the sheathing and insert the window frame. I’m not positive, but I think I can frame the window within the sheathing, and then simply cut out the hole for the window. This would simplify the framing because I could rest the boards against the sheathing, nail them into place, and then cut out a hole. Things are always easier said than down, however, so we’ll wait and see.

I feel inspired to do this, so the next step will be to see what sort of small windows they have at HD. I’m thinking atrium window, which would look the nicest and let in the most light. Once that I figure that out, I’ll need to find a way to transport rough cut boards to our house. I think I can manage 8 footers in the hatchback, though they’d stick out the back. I might also be able to tie them to the roof of the sedan, if I didn’t have to travel very far.

Life sure is complicated when you’re training to be a real man. Until the next time, thanks for reading, and thanks to Alexandrehuang for the pic.

Sunday, May 20, 2012

Clearing the Leaves

If you can believe this one, I finally finished raking the leaves in the backyard, and it only took me about 6 months. In retrospect, it worked out fairly well, because as the leaf pile sat through assorted spring storms, much of the debris was cleared out to who knows where, just not in our backyard. Out of sight, out of mind, as the saying goes. Also, after being pelted by all that rain, it sure did compress, so it wasn’t as daunting as it was earlier in the season. Finally, wet leaves don’t blow away, and this was a problem that I encountered trying to haul away piles of leaves to the compost area, they would blow and fall out of the wheelbarrow, leaving a trail of leaves that had to be cleaned up.

In the end, I’m not condoning putting off raking the leaves. As much as I dislike doing it, I think it’s better to tackle most of it in the fall. It’s just that this year, as I mentioned, we got an early snow in October and that pretty sealed our fate for the winter. Once the snow melted, I started raking the leaves into a massive pile, and then got distracted, so it sat. When I finally cleaned it all up, there was a massive bare patch on the ground. This is not such a bad thing since that section of the lawn is all weeds, Creeping Charlie and dandelions. My lawn rejuvenation plan hasn’t reached that section of the yard, yet.

Until the next time, thanks for reading, and thanks to Kevin D. Hendricks for the pic.

Friday, May 18, 2012

Saving the Plant

 Last weekend when we dug the trench, the path was going right through this nice plant that we have along the house. I don’t know what it is, the previous owners planted it, but it’s nice, and R was not too keen on destroying it. Naturally this made my life more difficult, because I was going to have to rescue the thing and then put it back in. It would have been much simpler to just trash it, but that’s kind of sad, anyway.

On Sunday morning before the excavator arrived, I got to work. I’ve moved plants before, and found that if you dig deep enough, give them plenty of water, and then put them back in within a reasonable amount of time, you can pull it off. The problem with this plant is that it seems to be dozens of individual plants, which it is not, it just looks that way. It’s some sort of bulb that I think expands its territory.

I had to break the thing up because it takes up about four square feet, and even when I did break it up, it was heavy. The question was, where to keep it in the interim. I used the wheelbarrow and some plastic bins, but it wasn’t easy, only because I was trying to keep them alive. I got most of them out, gave them water, and we dug the trench.

Afterward, I put them back in, though they were uneven and looked a little funny, compounded by the fact that they are three feet tall. R wasn’t so thrilled, not the best addition to Mother’s Day, but she was cool about it because she realized I was working my tail off and tried my best. I figured the most important thing is that they survive, and if they grow a little mis-directional this season, hopefully they’ll upright themselves next year. Wishful thinking? It wouldn’t be the first time.

Until the next time, thanks for reading.

Wednesday, May 16, 2012

Moving Wood

Now that my chainsaw is in the shop, I can do other firewood related activities, including moving the wood into the splitting area. I managed to cut about two cords, which is currently sitting in a pile by the logs. I usually cut the whole thing then move it, which takes days, but since I’m in limbo, I can move what’s done and that will make my life easier down the road. At least, that’s how the theory goes. I haven’t actually put it into practice, yet.

I also managed to move about 1/3 of a cord that was leftover from last year into the splitting area, so I can break out the maul and get to work whenever I can get motivated. Plenty of other things to distract me, however, so we’ll see when this grand plans goes into effect.

Until then, thanks for reading.

Tuesday, May 15, 2012

Decision Time

The time has come for us to make a decision about how to insulate and heat the barn, and needless to say, it isn’t easy. This decision is compounded by the fact that building any sort of living quarters requires vast sums of capital. Life would be so much easier if we just lived in caves. Things were so much simpler in caveman days.

Anyway, we had to come to a decision because in wiring the house, how it’s heated will affect where wiring occurs. Our options were fairly straightforward, if not a bit limited. For insulation, it boiled down to spray foam or fiberglass. Spray foam insulates the best, but it’s amazingly expensive, and this may sound like justifying my frugality, but we don’t necessarily want a house that is hermetically sealed up. A little breathing is nice.

The second issue was heating. Again, our options boiled down to a boiler and baseboard heating, a furnace and hot air, or individual propane air heaters. Our first thought was to go with the last option, which we had in Quechee. They work fine, and if you have a wood burning stove as well, keeps a house perfectly warm. The one issue you have to deal with, however, is hot water, which requires either a hot water heater, a boiler, or a tank less heater. A hot water heater is pretty straightforward, though maybe the least efficient. A boiler would be great but is too much to just heat water. If you had it for heat, as well, than it becomes an efficient option. The last one, a tank less heater, is what KB has, and he says it works fine.

We didn’t really know which to use, and of course my first instinct is to go cheap. After some thought, however, we think we’re leaning to getting a boiler and insulating with fiberglass.

Our logic went something like this. The cost of getting a few wall mount heaters (Rennai) plus a water heater and a stove would probably be about the same as getting a boiler, or at least you’re not saving that much money. A boiler and baseboard would give you a preferable form of heat, especially if we ever sold the place, and it also gives you hot water. The caveat with a boiler is that we were told we’d need to use spray foam, and that’s really expensive. The pipes would run inside the walls, and there they are more prone to freezing.

After much discussion with those in the know, we figured we could run the pipes inside of the fiberglass, and then put pipe insulation of the pipes. That seems like it would protect the pipes enough from freezing. At least that’s what we hope.

Whatever be the case, that’s where we stand. A boiler with fiberglass insulation. That’s our decision, and we’re sticking with it... at least until someone new talks us out of it.

Until then, thanks for reading, and thanks to B0xR for the pic.

Monday, May 14, 2012

Big Dig

We had some serious excavation work done yesterday, though in the grand scheme of building a house, it was pretty minor. I just goes to show you that it doesn’t take much to impress a city boy training to be a real man. Last week we tried to dig a trench with a hand operated ditch witch, and it seemed plausible to me, but when we actually stared the operation, it became clear that we were in way over our heads. It was kind of funny, actually.

We had to call in the big guns, so GD contacted a buddy who had a small excavator and we arranged for him to come on Sunday. I actually know the guy, he works over at Bob’s and is really cool. In fact, when he showed up, he looked at me and said, “I didn’t know it was going to be you.” He brought along his machine.

The digging was a piece of cake with this machine, and I’m always impressed with how easily those things tear up the earth. He dug a two foot wide trench about 80 feet long, and then GD and I laid the pipe that will hold the wiring to the barn. All in all, it took about two hours, which when you get down to it, is cheaper than having KB do it for 8 hours of labor using the hand operated machine. Plus, the machine made it much easier, and dug a sufficiently deep trench, which we were failing to do with the hand-op. Oh well, live and learn.

At one point I thought the guy was going to drive the thing into the trench, he was straddling the hold and decided to drive it off. He knew what he was doing and used the scoop to hold up one end. Pretty impressive stuff. Once the job was done, he filled in the ditch and we were in business. Our driveway is a mess, but part of that is more appearance than actual destruction. Plus, we may be on the cusp of fixing our driveway, so hopefully it won’t be a huge factor.

It was a nice day if not a little hot. Once the sun came out, it was tough shoveling and trying to save the plants, but that’s a story for another time.

Until then, thanks for reading.

Sunday, May 13, 2012

In Need of Bigger Equipment

We started out digging out that darn trench for the electrical to the barn, and before long we realized that the thing wasn’t going to cut it. KB picked up the Ditch Witch from Upper Valley Equipment and brought it over. The thing wasn’t that small, it looked pretty impressive to me, not unlike a huge chainsaw on wheels. It was a little daunting to run, with all sorts of controls for the wheel speed/direction and chain speed/direction. KB brought it over and started running it, but he admitted that it was his first time using such a thing, and that he had to leave at some point, leaving me to my own devices. Great.

After a while it became clear that the machine was best used with two people, because it helps to have someone clear and remove rocks as they clog up the inner workings of the machine. I went down to my knees to get some of them and it felt like a hammer hitting my kneecap. Talk about pain (though I couldn’t be a sissy around KB).

It was slow going, and eventually GD showed up and was surprised at how small the thing was. He thought we were going to get a small tractor/ditch witch, because once we hit the hard pack, the thing was going to be tough, not that they weren’t already.

After about an hour, we got about 20% of the way, but we hit a huge rock, and for the life of us, we couldn’t get that thing out. After struggling for about 45 minutes, it became clear to us that we needed a bigger machine, preferably something with a backhoe. GD’s friend down the road has one and he called him. We arranged for him to come over on Sunday and finish the big dig. I’m slaged to help GD lay the pipe and run the wire, so I’m not off the hook, at least not yet.

Until then, thanks for reading.

Friday, May 11, 2012

Searching For Wires

The Dig Safe guys came and went, and didn’t really accomplish what we had hoped they would. It was partly our fault, we didn’t clearly define our area of interest, but the end result is that I was going to have to do some exploratory digging to find any live wires. Best of all, I was going to have to do it by hand, with my Martha Stewart shovel, no less.

I obviously has some idea of where the wires would be, so I started digging. Finding the wire to the light was not so bad, it was shallow, but the main line going to the outlet in the middle of the driveway was going to be a little trickier because it’s deeper and more significant. What makes it a delicate operation is that you don’t want to severe the wire, so I had to take it slowly. It’s also deep, at least two feet, I believe.

In the end, I couldn’t really find it. I went two feet down, and then started moving laterally, but no wire. At some point I stopped because I wasn’t sure how much I should rip up the front yard, even though we’re going to tear it up with the ditch witch. Whatever my excuse is, I’m sure it won’t fly with KB and GD. Then again, that’s what happens when you send a boy in to do a man’s job.

Until the next time, thanks for reading.

Thursday, May 10, 2012

Safe Digging

Now I didn’t realize this, but you’re supposed to contact the people at Dig Safe before you dig a trench, or for that matter, just a hole. The ground is filled with wires, gas lines, pipes and other good stuff, so you don’t want to hit something dangerous with your shovel or tractor. For the record, I don't recall anybody coming before they tested the soil for the septic tank, and for that matter, when they installed the tank and system, but that's all in the past.

KB told me to give them a call and set things up, so I did, and they said they’d be there by Wednesday. Sure enough, they came on Tuesday, but they didn’t mark any of the ground wires in the path we were interested in. In all fairness, KB said he’d mark the way, but didn’t, so they didn’t know where we were headed.

GD was there while they were there, so I should have had him come out and chat with them, my bad. The end result is that the guys didn’t do what we needed them to do, and now I have to go out there and locate ground wires. Bummer.

Hopefully I won’t hit anything that explodes or is carrying 2000 volts. Plus, it’s been raining for the past week, which complicates matters. Oh well, this is when the real man show their true colors, right? At least that’s what I’ve been told.

Until the next time, thanks for reading, and thanks to Paul Keleher for the pic.

Tuesday, May 8, 2012

Final Walls

KB showed up last week and put in one of the final walls before we take the plunge and start thinking about heating and insulation, or in our case, ignore it for as long as we can in the hopes that it will either go away or take care of itself. As if that’s going to happen.

He finished the downstairs walls and will make a small wall upstairs, and then we have to dig a ditch to lay the electrical cable that will feed the barn. We need to rent a ditch digger, or “Ditch Witch,” as their called. That should be interesting, because I’m guessing yours truly will run the thing. Once the cable is laid, the barn will have water and electricity, which is kind of crazy.

Until then, thanks for reading.

Monday, May 7, 2012

Working in the Great Outdoors

As much as I love winter and the snow (and hockey), I have to confess, it’s really nice to be working outside. I tend to get tired and sleepy when I’m inside all the time, especially by the wood burning stove, but once I get outside, I sure do feel invigorated. There’s something to be said about being out there and getting dirty working with your hands. It somehow speaks to the male psyche.

Last week I started in on some of the big outside jobs, including cutting wood and mowing the lawn. At some point we’ll have to work harder on the garden, but I’ve been told you can do that as late as June 1. I started cutting the wood and got about 20% of the way in when I had some problems with the chainsaw, so we’re on hold until we hear from Joe’s. I had a bunch of pine blocks that I cut last year and started making kindling with them, which meant I got to use my new axe. The thing is sharp and kind of scares me.

My current plan for kindling is to keep most of the year’s supply in the basement, but have a good supply outside under shelter. This way it dries over the winter and we have a stash we can turn to if we run out. I tend to go easy with kindling, using only a few pieces to start the fire, but everyone else seems to like to pile the stuff on. I can’t complain because it’s nice when the kids build a fire, but they do get a little enthusiastic with the stuff. It’s easier when you’re not the one who has to make it all.


I spent the better part of Saturday mowing the lawn, and it’s looking pretty good, if I may say so myself. We haven’t put an ounce of chemicals on it, so I’m glad it’s growing naturally. It sure does look nicer once it’s coiffed, even though the dandelions always seem to take over, seemingly more so this year. You just can’t beat the weeds.

Until the next time, thanks for reading.

Saturday, May 5, 2012

More Shelves

As the saying goes, one good turn deserves another, or in this case, one good rout. I made some shelves using my trusty router, and not only was it fun, but they got rave reviews. It isn’t fine cabinetry, but it’s a step above what I’ve made in the past, and it’s not too shabby. Most importantly, R and the kids appreciate them, and have asked for more.

Now I originally built a large one for N because I thought his was falling apart, but I misunderstood that he needed to replace the smaller ones by his bed. His big one where he keeps his clothes is in fine working condition. A ended up with the big shelf, and that worked out beautifully because she really needs a place to put her clothes, and now she has something. She’s pretty keen on it. She could also use a long one by her bed to put on her knick-knacks and assorted objects of interest.

That, however, doesn’t address the problem of N, whose shelf fell apart. With this in mind, we headed over to Home Depot and got the lumber and necessary supplies. Since we are constrained by the carrying capacity of our car, I could only get about 30 feet of lumber, when in fact I could use much more to do all the things I need to do. It’s kind of funny, actually. In an ideal world, I would have bought 6 foot 1X12 pine boards, but in order to transport them, I’d need to lean the front seat all the way back and lay them down. I can’t do this with two kids in tow, so I opted for 8 foot boards that I had cut in half, which fit beautifully in front seat. In a pinch, I could tie them to the roof rack.

Now I have enough wood to build one more, and maybe two, shelves. I also plan on building some for the bathroom. I can’t wait, you just can’t beat doing real man’s work when you’re a real man in training.

Until the next time, thanks for reading.

Friday, May 4, 2012

Chainsaw Issues and a Bright Side

This breaks my heart, but we are having chainsaw issues, and they might be serious. I was just getting into cutting wood, too, and Joe’s was saying there is a two week wait on maintenance. Bummer. The goal is to cut the wood before it gets too hot, because running a chainsaw on a hot day with all the protective gear is a complete drag, to say the least, not to mention a bit precarious. For once I had my act together before this situation arose.

Now the problem I’m having with the saw is that when the saw is warmed up, when I release the trigger, the chain keeps moving, even though it should be idling. It’s a bit daunting when the chain is still moving when it’s not supposed to be. I asked about it previously and the guy at Joe’s, whom I trust, said it was probably the idle that needed adjusting.

When I started using the saw again, the problem cropped up, and I tried to look in the manual how to set the idle. It was, as always, not completely clear what they were trying to say, so I figured I’d bring the manual in and ask the guys at Joe’s to clarify. When I spoke with them, they said the problem sounded more serious because an idle adjustment problem would make the chain keep running even when the saw was cold. He said not to use it anymore and bring it in, in a rather ominous tone. I almost told him that they were the ones who told me it was the idle, but no sense in pissing them off.

I was bummed that I didn’t have the saw with me then and there, because I was initially going to bring it in so they could demonstrate how to adjust the idle. Now I needed to make another trip into brutal W. Leb, which is never a fun proposition, but you do what you have to do. I’m hoping the problem isn’t too serious (i.e., expensive), but all indicators seem to point to a serious problem. They are thinking an air leak, and maybe a $100 in repairs. They kept asking me how old the saw was, and it’s not that old, so I don’t know what to think.

On the bright note, and I’m not good at finding a bright note, the fact that I can’t cut wood means that I have more time to move the blocks that I’ve already cut and start splitting. Usually after I cut the tree length down, I have this massive pile of wood blocks that seem impossible to move and brings me down. I’ve done about 1/4 of the pile, so it’s a good start. Anything to chip away at the proverbial stone. Hopefully they can fix the saw, and before it gets too hot. Splitting isn’t so bad on hot days, it’s the cutting that’s hard.

Until then, thanks for reading.

Thursday, May 3, 2012

Getting Ahead of Myself

Way back when (so far back I can hardly remember) KB told me to extend the kitchen studs, I ended up with all these pieces of rough cut wood. I knew in the back of my mind that I would need a few more pieces to finish the job, but there was a lot. Getting more ambitious than I needed to be, I decided to build a hockey net.

After scouring the web for the proper dimensions, I built one that was close to what they use in the NHL. However, when I ordered a net, it turned out to be too small, and I realized that you don’t need a regulation size net to practice shooting pucks, just something with a net. Also, I ended up using all the wood, and now I need that wood to finish the job that KB gave me. So now I need to dismantle the net and use the wood for said purpose. This is the same net that I thrashed my thumb on while trying to screw it together. I suffered for that thing.

On the bright side, N isn’t even that into it because the net doesn’t fit. We need to make something smaller, and might use PVC piping, instead. We’ll see how that goes.

Until then, thanks for reading.

Wednesday, May 2, 2012

Gentle Touch

We were having some problems with our sink, and it was sort of driving everyone crazy in the way that dripping faucets can drive anyone crazy. The problem was strange because it was very inconsistent. Often the sink was fine, but occasionally it wouldn’t stop flowing, and would even come out in a stream after the valve was shut. It would take several tries before finding the perfect position to stop the water. I had taken the faucet apart several time to check the seals, but all seemed in order. I was pondering replacing the thing.

After some discussion with R, the idea was put forth that the problem was not with the sink, but with the person handling it, i.e., me. I was being too rough on it, and should be more gentle when I pushed the handle down. How could that be? Normally I wouldn’t believe such a thing, but I decided to give it a try, and sure enough, it worked. My skepticism was put to rest when I saw it with my own two eyes. I still found it hard to believe, but eventually I had to accept the fact that I was the problem. Don’t you hate when that happens?

Oh well, at least we don’t need a new faucet, and that makes it all worthwhile. Until the next time, thanks for reading.

Tuesday, May 1, 2012

Screw That

I had to extend the kitchen wall studs, a job KB gave me several weeks back, and it was amazing enough that I pulled it off. Upon further inspection, however, it dawned on me that if the studs are going to hold up cabinets and other good stuff like that, they really need to be secured. With that in mind, I had this brilliant idea that maybe I should screw them in to make them stronger. When I broached this idea with KB, he said do it, after which I wondered why he didn’t say this in the first place, but no sense in asking certain questions.

I was at HD so I picked up some 3 1/2 inch screws, though they were exterior screws because I couldn’t seem to find long wood screws that weren’t exterior ones. That’s what happens when you send a real man in training to do a real man’s job. Whatever be the case, they’ll work, so I’m not complaining.

Until the next time, thanks for reading.

Monday, April 30, 2012

Things Are Not As They Seem

Ain’t that the truth? Talk about flip-flopping, I should just keep my mouth shut until all is said and done. I was cleaning the chainsaw when I decided to check the air filter, which the manual says to do regularly and I had never done in the three years since I first got it. I know, my bad, but it begs the question, how many of us regularly check the air filter in our cars? I thought so.

Either way, that’s the not the point. I checked the air filter and it looked completely caked with dust. They say to clean it by tapping the dust off or using an air compressor and blowing it off. I tried tapping, and it seemed like it was glued on, so I went to Joe’s and got a new one, and believe me, they are not cheap. When the woman handed me the filter, I was surprised that it didn’t look that different than the one in the chainsaw. It’s covered with the film that looks like sawdust to prevent fine particles from getting through. My first thought was that the old air filter was fine, and I didn’t need a new one, especially since they’re not cheap. Then I figured I’d need to replace it at some point, because we use the chainsaw a lot. So I got it.

When I got home, I took another look, and wouldn’t you know it? The filter was actually a mess. Even though there is a film on it, it was caked with dust that I couldn’t get off. The problem you run into is that if you are especially rough in trying to clean the thing, you’ll end up ruining it.

In the end, it needed replacing, and after all that ruminating, I realized it was good that I got the new one. I lucked out on that one.

Until the next time, thanks for reading.

Friday, April 27, 2012

Finally Some Rain

Boy, when you live in Vermont, you realize the weather doesn’t hit you half way, it’s all or none, and then some. We had a serious dry spell in the beginning of spring, we were even approaching drought conditions, and even I, who doesn’t like rain and much prefers the snow, was pining for some precipitation. Sure enough, the storm clouds rolled in then we got about a week straight of it. For the record, I did not complain, but it’s striking when you don’t see the sun for several days.

To make the situation all the more fun, it’s been windy for about a month straight, and now that the rain is taking a break, it’s windy as heck. Not sure what to make of it, but at least it’s cool and dry. A good time to start cutting some firewood, so I’ll have to get on that.

Until then, thanks for reading, and thanks to Velachery Balu for the pic.

Thursday, April 26, 2012

Real Man Injury

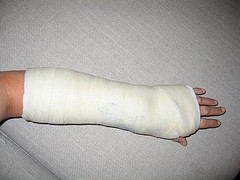
Last week I was trying to build a hockey net out of extra rough cut wood, and I hurt myself pretty badly. Not bad enough to elicit sympathy from the real men I know, because I didn’t lose any digits or limbs, but bad enough to where I was whining and hungering for sympathy. The problem was I got sloppy, and paid the price. The net is about 4 feet high, which isn’t that high, but required using a drill at an awkward angle. I also had to press down to drive in the screw, and they were long screws, about 4 inches.

Anyway, at some point, when I was trying to push the screw down, the drill slipped and drove right into my thumb. In a way, I was lucky it was as screw driver bit and not a drill bit, because that would have been nasty. The injury was nonetheless painful, if not a bit gruesome.

Nothing was broken, but I couldn’t use my thumb for a bit, and I could very well lose the nail. It’s not pretty, but it gives me an excuse not to spar in karate, and it might even get a sympathetic nod of approval from my real-man friends, for whom I can’t be a sissy.

Until the next time, thanks for reading, and thanks to thenakedsnail for the pic.

Wednesday, April 25, 2012

Fun With Routers

I finally broke out my router and made some shelves, and it was a lot easier than I thought it would be. N has some cubicle-like shelves that he keeps his clothes in, and it actually works out nicely, except that their are like Ikea specials, and eventually all that stuff starts to fall apart. R asked me to make something more sturdy, and I figured it was a good time to break out the router. I’d never used until now.

I learned a thing or two about using it, and for that matter, making the shelves. In the past, making shelves was pretty easy. You just line of the boards perpendicular to one another and screw fasten them with screws. It doesn’t look perfect, but it definitely looks good enough, and the screws hold the unit together nicely.

Now when you really get into making shelves, you use a router and fit the boards together into the groove. In an ideal world, you don’t even need to screw the boards in, eliminating unsightly screw holes in the side of the unit, or the need to fill them in with filler or plugs. Just some wood glue and maybe some finishing nails and you’re in business. The other problem you run into is when two shelves meet at the same point, whereby you can’t drive two screws in both directions. This may be hard to envision, but suffice it to say that without that groove to hold the shelf in, you can’t put dividers between the two outer shelves unless you stagger the pieces, allowing for attachment with screws or nails.
 
My plan was as follows: attach the shelves to the outer boards with screws, counter-sink the holes (listen to me) and fill them in with plugs, and then glue the shelves to the middle divider. Of course, I ran into problems at every step of the way, but man was it a learning experience. First off, counter sinking the holes has never worked out for me. I realize I’m a novice here, but the holes always get shredded and it makes more of a mess than it’s worth. Plus, the plugs never fit in properly, and it looks bad. I found it much better to just drive the screws in deep, and fill with filler.

The second thing I found was that I could actually screw in one side of the middle divider, and then glue in the other side. This would make it much more sturdy, not to mention easier to make. I also realized that to glue the shelves in properly, you need something to bind the pieces of wood together tightly, and even draw them together. That’s the funny thing about wood, the lines usually don’t perfectly match, but it’s somewhat malleable, so you can force things into place. I found the shelves didn’t always fit in perfectly into the groove, and I wasn’t able to force it in with my hands. However, with the use of a clamp that I could tighten, I could force the pieces in place and it would look great.

Anyway, it was a bit of a fiasco, but I came out of it in one piece, and now all I need to do is sand the thing and paint it. I’m rather proud of it, actually, and now feel much more comfortable using the router. I admit I had reservations using a new tool, especially one that has a high speed bit that’s sharp. I had heard that you run into problems with shredding the wood, but nothing a little sand paper can’t fix.

Until the next time, thanks for reading.

Tuesday, April 24, 2012

New Axe to Grind

In the content quest to heat our home, there are countless jobs that need to be done, and one of them is having enough kindling. Not an easy job considering that we go through so much of it. Plus, I tend to be frugal with kindling, because you don’t need that much to get the wood started, while other people in this house like to pile the stuff on. It’s easy when you’re not the one making the stuff, but I’m not complaining, because I’m grateful that other people take the initiative to get the fire going.

Plus, I’m not the only one who makes kindling. The kids love to help, especially N, who is embracing real man duties at an early age. I tell the kids to always hold the hatchet with both hands. Speaking of hatchets, ours is starting to fall apart, a common occurrence with wood handles. This is the third one we’ve had. At some point, the head starts to fall off the handle, and it’s a little precarious swinging an axe with a loose handle. At some point I decided to get a hatchet that was a solid piece of metal, and I finally accomplished said goal.

I got a nifty new Estwing axe, and the thing is too cool. It’s a heck of lot sharper than the old one, and since it’s a solid piece of metal, there’s no worry about the head flying off. My Mentor and PR would be proud that I went with quality over dirt cheap. Now I’m even excited about making kindling, sort of.

Until the next time, thanks for reading.

Monday, April 23, 2012

Being Environmental

I’m never really clear on the proper protocol for disposal, and it really depends on who you talk to. Even then, it changes from day to day. My big dilemma is how to get rid of plywood. With regular pine scraps, you just burn the stuff, but plywood is partly synthetic, and though it’s mostly wood, there is glue holding it all together. Not the best stuff to burn.
I’ve spoken to people whom I consider to be very environmentally friendly, and they’ve said, with trepidation, that you’re not really supposed to, but just burn it. Others have said on certain occasions that it’s not good for the environment, and then on other occasions to just burn it (wink-wink). Then there are those who say, “Just burn it you tree-hugging sissy.” What to do? It’s complicated by the fact that some of the pieces are big.

I finally decided to bite the bullet, cut the pieces into manageable sizes, and dispose of it properly, at the dump. Sure, it costs me money, and the guy at the dump is grouchy, crotchety old man, but I can sleep better at night knowing I didn’t take the easy way out. Besides, these neurotic adventures give me plenty to write about in this blog.

Until the next time, thanks for reading, and thanks to Bree Prince for the pic.

Spring Has Sprung

Spring is in full swing over here, and if anything, it’s warmer than usual, which does not bode well for summer, but real men don’t whine, right? Either way, it’s been strangely warm for April, not to mention bone dry, so much so that as strange as it may seem coming from my lips, I really think we could use some rain. There is even some rain in the forecast, so it’s a good time to spread some seeds.

A couple of years back I had this brilliant plan to salvage our front yard, and I think it’s working. The problem was that I didn’t do much in the way of lawn care when we first moved into this house. Truth be told, I had no clue what to do, so the weeds really took over. The kids had fun with the big plants, but at some point they destroy any semblance of a lawn, as my Mentor so astutely pointed out. The usual response to these sort of events is to spread weed killer and turf builder. We even have an unopened bag of it in the barn, but I don’t want to use toxic chemicals just to get a suburban lawn. As I’ve been told, if it’s green and can be mowed, live with it.

That doesn’t mean I can’t try. My plan was to try to encourage the grass to overtake the weeds, naturally. I got grass seeds, which for the record are not cheap, spread them over the lawn in spring and fall, and just waited. Sure enough, the grass is looking better. This translates into more maintenance, but nothing a real man in training can’t handle.

With that in mind, it’s time to tune up the lawnmower and chainsaw. I changed the blade in the mower late last year, so it’s fine, at least for now. I got a new blade that I can install later in the season after I’ve mowed a few rocks and branches. I put in fresh oil, changed the filter, and I’m good to go. Now all I need is gas.

On the chainsaw front, I got a new air filter and I realized that the old filter isn’t irreparably caked with dust, it actually looks that way, brand new. Silly me. I think it’s good to have a replacement/backup filter, so all is not lost, but ignorance can really come back and bite you in the you know what.

Until the next time, thanks for reading, and thanks to promanex for the pic.

Saturday, April 21, 2012

Real Man’s Work (pending)

I have a series of projects that I want to get done before the summer is over, and preferrably within the next month. How’s that for being ambitious? First off, R mentioned that N needs new shelves to put his clothes on. Say no more, I like making shelves, except this time around, I’m getting ambitious and am going to use my router. If you build a simple shelf, all you have to do is screw the lateral pieces onto the vertical pieces and you’re good to go. However, when you want to put a vertical divider in the middle, you run into the problem of fastening the shelves to the middle piece. You can’t screw them in unless you stagger the shelves, which is an option, but not as cool. Plus, routed shelves look nice. So I’m going to give a try, which at the very least should be interesting, if not amusing.

The second project is painting the interior trim white. This is mainly in the living room and study of our house. This sounds simple enough, but the wood is stained with an oil stain, which will require a special primer to cover it. After exhaustive research, I found one that is low VOX, it’s just a question of waiting for a warmer day so I can keep the windows open.

Finally, the last big project is finishing the front entry way. One of the big issues was the damage we did to the frame when we moved it. The door won’t close without a monumental amount of effort, rendering it unusable. My first thought was to replace that section of wood, then cut a hole for the door to grab. However, when we replaced the door knob, the new hardware seemed to grab much better, and the door works fine... for now. The things that need finishing are the floor and walls, both of which I think I can tackle, but we’ll see. It would be nice to get it done because it doesn’t look so great.

All this on top of my already busy life, but we wouldn’t have it any other way, now would we? Until the next time, thanks for reading.

Friday, April 20, 2012

Chainsaw (Almost) Ready

With the warmer weather that is not yet too warm, it’s time to start thinking about cutting up that wood pile in our front yard. I broke out my chainsaw and did some tune-up maintenance, which was more involved than I thought it would be. First off, I was sharpening the chain with my Dremel tool (thanks to my Mentor) and I realized that the sharpening stone looked a little worn. Funny how that works. Not only that, but it looked like it shrank.

I set out to get a new one, but wasn’t sure where to go. I had a sense that Home Depot carried them, but that was a bit of a trek, and we were in Norwich, so I asked around. The True Value in Hanover didn’t have it, neither did Dan and Witts, though they said they could order it if I knew what size I needed. This, of course, required that I know the size of my chain, and as you can guess, I did not. Sort of embarrassing for a real-man in training, but in all fairness, when I actually looked at the chain package, it wasn’t really clear. They indicate the size of the chain, but not the actual diameter of the file that I needed. They would have known this in a second at Joe’s, but I wasn’t at Joe’s.

Either way, they didn’t have it, so it didn’t matter. I finally went to Foggs, and they had an amazing assortment of Dremel accessories. They even had the variety pack of chainsaw sharpeners, and from that, I could figure out what I needed, because they color code the sharpening stones, and I could recognize what I needed. It turns out I needed a 3/16th stone, which I got. Whew! It also became clear to me that the old sharpening stone was worn down and narrow, so it was good I replaced it.

After sharpening the blade, I decided to inspect the air filter, something I’d never done before, and saw that it was caked with dust. The manual says to tap it clean, but that stuff is glued on. I need to get a new one, which is a bummer because I was just at Joe’s. Now I may need to go to Charlie Brown’s, which is much closer, but that store smells like an ashtray. Not a pleasant environment.

At least I’m close to being ready, and I think within the next week or so I should be all set to tackle that wood pile. Nothing like using a chainsaw to make a city boy feel like a real man.

Until then, thanks for reading.

Thursday, April 19, 2012

Oops!

I tried to impress GD with my Sawzall prowess, and screwed up in the process. The guy knows what he’s doing and probably just chuckles when I try to do real man’s work, but you have to start somewhere, right? He is in the process of installing light boxes in the ceiling, and he asked me where we wanted them. Like I know the answer to that? I told him some locations, but after putting one in the dining area, I thought it was a little off, so I took the initiative and cut it out and moved it over. Little did I realize that the strapping that flanked the box was purely for reference so that he would know how low to put the box relative to the sheet rock that would eventually be there. I thought it was structural, and almost nailed them in. That would have been really embarrassing.

As it is, I placed the box too low, and will again have to cut it out and move it up. Good thing I have my reciprocating saw, it sure comes in handy. Another thing I screwed up was using the excess 2in rough cut, or what I thought was excess. I had all these boards that I ripped left over, so I figured I’d build a hockey net. What else is there in life?

Well, GD told me that I’d need to do more extending along the walls, so I’ll need more 2in blocking. I have two 8 ft pieces left, which might be enough, at least to do the windows. Otherwise, I have some smaller pieces that I can nail in end-to-end, and I also have another rough cut 2X4 that I can rip, but let’s wait and see, shall we?

Until then, thanks for reading.

Barn Update

The barn is moving along nicely, though we hit a bit of a stall with KB on vacation, but that doesn’t mean things aren’t still in motion. Besides, it allowed me to finish the jobs on my to-do list. The electrician has been coming regularly and has installed boxes and wires all over the place. He’s also a contractor and has been giving me advice on the small projects that I am doing, and it’s much appreciated. GD is a real down to earth and cool guy, I appreciate his input.

The next big project will be to run the power line from our house to the barn, and that’s going
involve several people. First off, we need to dig a trench, or by KB’s estimations, I need to dig a trench. The plan is to rent a “Ditch Witch” that can do the job in about an hour. Then, we’ll lay a pipe down that will house the wire, and the electrician will install a breaker or box or whatever they call it. We had to make some decisions as to where ceiling lights will go, but I really relied on the opinion and advice of the pros, i.e., KB and GD. The bathroom fan lights that I ordered (re: HD fiasco) arrived, and I left them with GD to do what he needs to do.

We need to finalize the insulation decision, but after consulting with my Mentor and speaking with others in the know, I’m pretty convinced that we’ll use fiberglass. I’m sick of fielding opinions, especially from hardcore energy folks who promote the gospel of uber-efficiency. At some point you have to ask yourself how sealed up and air tight you want your house to be, and how much is enough, or more than enough. Don’t get me wrong, I can appreciate their zeal for reducing energy consumption, but it’s easy to be enthusiastic about it when it’s not on your dime.

Once the insulation is in, and who knows when that will be, we’ll put up the drywall, and then I’m guessing either the floor or the trim. Then we’ll have to think about siding and all that good stuff. How crazy is that?

Until then, thanks for reading.

Wednesday, April 18, 2012

Mama Kindling

The other day I started working on the kindling pile, and managed to split up all of it, or at least what was on the floor. This is sure to be appreciated by R. Since we are working on the barn, there is a fair amount of scrap wood that gets left behind, which is fine by me, because we go through a fair amount of kindling. I cut the longer boards up and I had a fairly substantial pile of dried pine, which I transferred to the basement. Unfortunately, this left a huge pile of wood on the floor, which sat there for weeks. R never complained because she knows what it’s for, but I know it didn’t make her happy.

I finally went down and dealt with it, and as big as the pile was, it only made about 1/3 of the wood that we’ll need over winter. Bummer. At least the mess is cleaned up, sort of. Another problem is that my hatchet is falling apart. I tend to get the cheaper ones with wood handles and then replace them as they go, but this can be a pain. Also, at some point, you’re swinging an axe with a loose head, which is never a fun thing. Somehow those shims never seem to work perfectly.

Also, I’m going to need to make kindling from scratch, which means splitting it from logs. This can be sort of fun if I had all the time in the world, but I don’t, so it becomes sort of stressful because it’s one more thing that needs attending to. Oh well, nobody said being a real man was easy.

Until the next time, thanks for reading.

Chipping Away and Hitting a Wall

Not to be such a whiner, but I still have to finish working on that leaf pile, and I’m not very excited about it. The pile is huge, and every time I move a few wheelbarrow loads, it doesn’t seem to even make a dent. If anything, the pile seems to grow. I’d say I got about 1/3 of it done, and then other obligations took me away, and now it’s once again just sitting there. I’ve definitely hit a wall. My goal for the next week is to move that darn pile and get it out of the way so I can get on with my life, whatever that means.

On a bright note, the grass is starting to grow nice and green. All that seeding may be paying off.

Until the next time, thanks for reading, and thanks to Chiot's Run for the pic.

Tuesday, April 17, 2012

Home Depot After Hours

The customer service at Home Depot has drastically improved, no question about it, but I learned that going after hours is not the best time when you have questions. They used to have a slogan, “You’ve got questions, we’ve got answers,” but they should have prefaced that with “Before the hour of 6:00PM.” I’m not knocking HD, they are helpful and the people are usually really friendly.
The problem I ran into was when I needed to pick up some light fixtures for the bathroom. I needed two fan lights, the kind that kick in when you use your bathroom and make it more tolerable. I was told LaValley’s or HD. We had hockey games to attend, so I wasn’t able to do it during normal hours. I was going to have to go after hockey and supper at Boloco, which meant after hours. N said he’d accompany me, so we headed over and looked around. It was nice because the store was empty, but that can work against you when you need help, and I always need help.

First off, I need a 250ft. roll of wire, it’s called 12/2, heavy gage yellow stuff. I asked the girl at the counter and she was completely clueless. She called some guy to help, and he took me over to the wire area and showed me some 12/2, but it was twice the price I was told it would be. I told him so, and it was clear that he didn’t completely know what he was doing because furiously reading tags and labels. Typical HD syndrome. I sort of knew what I was looking for, so after a few minutes of searching, I spotted what I wanted. The difference was the stuff he gave me was outdoor wire. It’s gray and twice the price. I realized I needed indoor wire, which is yellow. I can’t completely fault the guy because he was dealing with insufficient information from me, but it just goes to show you if you’re clueless going into the place, you can come away with the wrong stuff. It ends up being a waste of time and money.

Our adventures didn’t end there. I still needed the fan light. I went to the light section and they had a few, but only a few. Their display shows probaly two dozen choices, but they only had about a half dozen in stock. N helped choose a style, which they didn’t have. I had to go back to the customer service woman and ask if they could order one, and you could see the disappointment on her face when she saw me coming. She basically told me I was better off just ordering it online. Thanks a lot.

In the end, I just ordered it on Amazon, because you can’t beat them for online ordering. That is, of course, as long as you get the free shipping.

Until the next time, thanks for reading, and thanks to BernardBoyGenius for the pic.

Monday, April 16, 2012

Insulation and Heating Decisions

The time that R and I dread is upon us, which means we need to make a decision. Never an easy thing for the likes of us, though we have an idea of what we want. What makes it complicated is when the experts don’t agree with our decision.
Our initial idea was to put in fiberglass insulation and then get forced-air propane heaters, or Rennai heaters. We had them in Quechee, and they worked great, though for full disclosure, we lived on the second floor of a condo complex, and we had other dwellings below us and next to us, so we benefited from their heat. Even still, the air heaters worked fine, and they are much simpler to install.

Now for whatever reason, most contractors I meet are not so into this arrangement. They tend to opt for the more high-tech and drastically more expensive options. Granted, they are usually more efficient, but in my opinion, are often seem more than what is necessary. I remember the previous contractor wanted to put in hot water pipes under the floor, which makes for a nice and cozy house, but is an expensive option. Now talking to KB, he is endorsing a boiler/baseboard heating setup with either spray foam or cellulose. I realize these are modern, state of the art choices, but man are they expensive. Our house is fiberglass with wood heat, and we are fine. Sure, it’s not 80 degrees inside, and it’s not as sealed as it could be, but we like it that way. A house should breathe, shouldn’t it? We’re not sissy city folks anymore, we like a little draft now and then.

This hasn’t come up outright, but I sense a little reluctance on going with the fiberglass. It could very well be just my insecurity, but I’ve yet to really get a ringing endorsement, but we have to keep in mind that we have to ultimately come up with the decision. We are leaning to fiberglass. After consulting with my Mentor, he said fiberglass is fine, and I also spoke with another contractor friend who said he just built a camp up north and he used fiberglass. Plus, if we used fiberglass, I could theoretically put a lot of it in myself, and it would be a fraction of the cost. We are talking an order of magnitude, here.

We’ll see where this one goes. Until then, thanks for reading, and thanks to benjaminsteel for the pic.

Friday, April 13, 2012

Picnic Table Revelation

Our picnic table is a bit of a mess, all because of several bad moves on my part, of course. Chalk it up to inexperience and the early stages of my real man training, but I did some things incorrectly, and the table suffers accordingly. First off, I constructed it wrong. Several of the holes were pre-drilled, so I just screwed in the bolts, but something isn’t right. I think I may have reversed the boards or something, but the seat is too high, and as a consequence, the space between the seat and table is too narrow, making it hard to get your feet in if you’re over the age of twenty.

I spaced the seat joists too far apart, and the seat flexed too much, so I had this brilliant idea to put a supporting beam beneath it. While this does give support, it in my opinion makes the seat hard as a rock. You need some flex, even just a little, to make it more comfortable. Finally, I used the wrong stain. Since it’s a table we’re going to eat on, I used an eco-friendly stain, which was really meant for indoors. It looked good at first, but after the first winter, the stain started falling apart, and now it looks terrible. Plus, we used that table to make dumplings, and it’s really taken a beating.

My initial reluctance in fixing the table stemmed from the difficulty I foresaw in removing the screws, which were set in pretty far. Then I realized I could, if need be, just cut them with my reciprocating saw. Problem solved. Also, if I needed to, I could just bore new holes to hold the carriage bolts. Then, I’ll sand it and put on a more durable stain.

It’s amazing what you can do with some power tools. The hardest thing will be to just get started.

Until then, thanks for reading.

Wednesday, April 11, 2012

Driveway Aspirations

Now that the weather is warmer and drier, the issues we had with our driveway have magically disappeared, and with them, our concerns. This is an unfortunate turn of events, because it makes us complacent and forgetful about how bad it can be. Somehow, each year we survive, and we figure we can get by for another year, when in fact, I think there will come a day when we’ll get stuck, and then it might be too late. Granted, the mud will eventually go away, it always does, but at some point you have to be a little proactive.

With this in mind, I think we should take some action. At the very least we should do what PR does, which is dump a load of gravel on the trouble spots. Gravel is dirt cheap, which makes sense because it’s just rocks. It’s the transport that kills you. The other issue is that darn drain pipe. I still think that we should build a culvert and somehow divert all that moisture through it. As usual, I’ve never dug a culvert before, but it seems pretty straightforward. They say the biggest issue is when it freezes closed, because the water simply runs over the path, but we don’t get that much moisture, just enough to turn the road into serious mud.

Finally, there’s the option of a new driveway, but that is something that would require professional help, so we’ll ponder that one for a bit. I’ve spoken with a few excavators about it, so I have some sense of what needs to be done. We’ll see where this one goes.

Until then, thanks for reading.

Tuesday, April 10, 2012

Door Knob Crazy

One good turn deserves another, as the saying goes. We put all new door knobs on the barn and our house, but I’d forgotten that there is a door on the second floor of the barn, and we also should replace the deadbolt the French Doors on our house. Back to LaValley’s, who for the record have been very helpful with this endeavor. In fact, not only have they had the things I wanted, but they were friendly, and their prices were very competitive with Home Depot. Plus, I get a discount because I have an account over there. You gotta love that.

Anyway, the one complication is that our French Doors have unusual hardware, and I cannot find an exact match. I can come close with the deadbolt, but it’s slightly off from the handle, which is somewhat unique. I like it, and N has indicated that he’d prefer a handle on that door, so we’ll keep it for now, but eventually I’d like to find a handle that matches the color of the deadbolt. The main issue is that most handles are much bigger, and the current one is small.

In the grand scheme of things, it’s a minor issue, but an issue, nonetheless. Thanks for reading.

Last Step for the Well

One of the important steps for getting the barn finished is finallizing the water system, and that requires the input of the septic engineer. I had no idea this was all part of the process, but apparently before the house becomes official, the engineer has to do one final inspection (done) and then, once the water is connected, he informs the state that the job is complete. I thought you just hooked up the water and took a bath. There were a couple of issues that we needed to address, like securing the pump lid on, which was pretty easy (even I could do it), but that’s all been taken care of.

What’s pretty cool is that there is now water in that barn. Can you believe it? KB hooked the pipes up and now it’s ready to rock and roll. Crazy. I think the electrical is getting to where it needs to be done, and we need to make some insulation decisions, which is never easy, but we are well on our way.

Until the next time, thanks for reading.

Monday, April 9, 2012

Finis

In what is truly a proud moment in a real man in training’s life, I was given a series of jobs to do by a true to life real man, KB, and I actually completed them. I know, it’s hard to believe, especially since I finished them in less than a year, but they’re done.

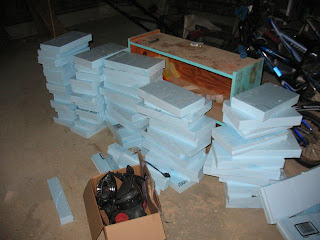
In did the last of the insulation in the rafters, changing the original plan with KB’s blessing. I was told to install the foam blocks using nails, but I found it didn’t work that well. After putting a few in, I wondered why we didn’t just glue the things in, and when I inquired, KB said that would be fine. This, of course, made life much easier, and not to mention making the job quicker. Best of all, the kids got to help out, though help is subject to interpretation. It’s pretty amusing when you’re trying to do a job in a confined space and your kids are tearing around on their scooters. The barn is the perfect surface for it.

In another humorous moment, A&N wanted to help by handing me the pre-cut blocks while I was on the ladder, and as I applied the glue and reached out for them to hand it to me, they weren’t paying attention because they were making shadow animals on the wall. Ah, parenthood, you have to love it.

Until the next time, thanks for reading.

Friday, April 6, 2012

Raking It In

Boy, I thought I had it easy last fall because we had an early snow in October, but now I’m paying the price. When it snowed, it really came down, and suddenly in early fall there was major snow coverage. I had not even started to rake, so I couldn’t really do much after that. I was kind of happy, because raking is easily my least favorite thing to do.
Now that spring is here and the snow is gone, I now have a massive quanitity of leaves to deal with, and as you might have guessed, I am not a happy camper. If there is one bright side to all this, it’s that the leaves are a little soggy from the snow, so they don’t all blow away once I get them into a pile. It’s not much, but when you’re dealing with raking leaves, you have to take what you can get.

Until the next time, thanks for reading, and thanks to Light Collector for the pic.

Thursday, April 5, 2012

Fixing the Kitchen Sink

When you’re training to be a real man, little jobs suddenly become major accomplishments, especially when they involve tools, dirt, sweat and scum. We were having some issues with our kitchen sink, it was draining properly. This is the same sink that JH and his magic bag of tools installed, replacing the pre-existing garbage disposal. It was quite a feat. The new drain, however, was beginning to clog. It drained really slowly, and when we ran the dishwasher, the water would back up and come up the sink hole. Completely disgusting.

Finally I decided to take action. My first thought was to simply try to clear the obstruction through the top, i.e., the easy way. It’s not easy to clear out plumbing slime, however, so I was going to have to remove pipes and clear them manually. I do this on a regular basis in the bathroom, so I had some sense of what to expect, and of course, it wasn’t pretty. It turns out that the connecting pipe had loosened and descended and was no longer at the proper angle to maximize the flow of water. After I fixed that, I reamed the pipe and cleaned the grate, and lo and behold, we had flow. I love when that happens.

I think we need to regularly run water down that drain to keep things moving along. Until the next time, thanks for reading.

Tuesday, April 3, 2012

Four Out of Five Ain’t Bad

I nailed in the ceiling joist braces last week, and let me tell you, it wasn’t that easy. You don’t realize it, but nailing upwards into the ceiling is a bit of a chore, especially when you’re not a tall person (I just play one on TV). It is definitely one of those tasks that are such a drag that I tend to put them off and ignore them in the hopes that they will magically go away.

However, this time around, I feel like we really want to get this barn finished by the end of summer, if not sooner, so I stopped being such a sissy and just did it. Believe it or not, it’s done. I found the best approach was to not even try to finish it in one day, but rather break it up over several days. It sure felt good nailing in that last brace.

That means that I’ve done the braces, installed the door knobs, cleared the clutter for the electrician, and ripped those wall extensions. Man do I feel like a real man, or rather, a real man in training. The last thing to do to cement my manly status is to insulate the rafter-gaps, or whatever they’re called. I ripped a bunch of blue board and cut it to size, so I’m ready to go. The initial plan was to nail them in, but after consulting with KB, I instead opted for glue. Much easier, and more effective, if you ask me. I know, you’re not asking me.
Once those blocks are in, we are ready to start thinking about insulating the whole structure. From what I’ve been told, we need to go with spray foam or cellulose, both of which are pricey. Fiberglass will not do because the heating system is going to require pipes that go through the walls, and unless you have the right insulation, they’ll freeze. Bummer.

We’ll cross that bridge when we get to it. For now, thanks for reading.