Saturday, September 25, 2010

Hazardous Waste

How's this for bad timing? We were having some problems with securing our cottage in the Great White North. Since they don't use US dollars in Canada (the nerve), R had to go through this whole rigmarole to send the deposit, which never arrived. With time running out, we were on the verge of having to go to Montreal first to pay this person, which meant that we'd have to leave earlier.

Normally I would have welcomed an extra day to spend in Montreal, but I had to take care of the hazardous waste, which only happens twice a year. I have a box full of sterno cans, some old gasoline from various yard endeavors, and some old cans of oil based stain.

I've been told by the guys at Joe's that because gas now has ethanol, you don't want it sitting around too long before you use it. They said 30 days, which seems extreme, but I try to take their advice to heart.

With that in mind, I have a couple of gas cans that need disposal. I could just hold onto them for another 6 months, but I'd prefer to get rid of them and move on with my life.

I was planning on doing it before we left, but if we leave on Friday, no can do. We'll see what happens. Some people told me to just pour the gas on the ground and light it, but I don't think I'll go there.

Until the next time, thanks for reading

Friday, September 24, 2010

Progress on the Front Step

Okay, I'd say we're about 75% done with the front step. What is really cool is that N likes to help me out and work with me, though help is subject to interpretation. Whatever be the case, he is interested and loves working with his hands. It's really cute watching him work, too. He's so earnest and sincere, and tries so hard to do a good job. You have to love that.

We set about shimming with cedar shims. The pitch was just right, not too much, not too little, and though we could have accentuated the incline and ensured complete flow of any moisture, I think it would have looked a little funny.

N helped me secure the shims. We tried nails at first, but they wouldn't penetrate the cement board. Funny how that works. What we did instead was staple the shims in, then place the plywood over them and drive screws through the plywood and shims. Like my Mentor is always saying, never drive a screw/nail through an open gap.

It didn't take long, we managed to cover the entire step with the plywood, and now we are ready to waterproof. We have two days before we leave, so time is running out, and it's supposed to be rainy next week. Funny how moisture becomes your nemesis when you're building a house.

Until the next time, thanks for reading.

Wednesday, September 22, 2010

Prioritizing

Amidst all of the euphoria over not having to make dumplings, I feel like I've failed to prioritize what needs to be done in a short amount of time before we go on vacation. It sure felt good to split and stack wood again, and cutting the grass and painting the dormers needs to be done, but what I really need to do is focus on the FEBP and pitch the front step and get some sort of water-proofing down, at least to protect it before it gets rained on. Even a tarp would do in the short term.

For the record, we really need some rain, but I've learned to be careful what you wish for.

My plan is to flash it and then I'd like to cover it with I&W shield to prevent rotting, even though that stuff is a bear to work with. My brother-in-law PR has alluded that this is overkill, but better to regret what you have done than what you haven't, right?

Once I shim and get that plywood over it, I can waterproof and then put on the final step. After that, I'll finish doing the trim work, then clapboards and paint, and voila. Completion of the first, and biggest, step of the FEBP.

I'll temper any celebratory moods because often when I am on the cusp of finishing something, I tend to let it languish for prolonged periods. Not a good thing.

Until then, thanks for reading.

More Wheelbarrow Issues

Just when I thought it was safe to use the wheelbarrow, new issues began cropping up. I had noticed that it was giving a rough ride, sort of bumpy, but figured it was just how a wheelbarrow moves. Upon closer inspection, however, I noticed that the one of the bearings had broke and the wheel was unbalanced. This caused the wheelbarrow to give a really bumpy ride.

Knowing this, I felt like I shouldn't haul such heavy loads, and decided to fix the thing. Of course, it wasn't as simple as it seemed. I had an old wheel that was the original equipment in the basement. The tire had blown last year, and being in a hurry and too lazy to replace the tire, I simply bought an entirely new wheel, tire and all. It was the quick fix, but in retrospect, I'm not sure if they sold just the tire.

The wheel ran fine, but at some point I noticed it ran rough, and now I realize what the problem was. I had this brilliant idea to simply exchange the tires and put the good tire from the bad wheel onto the good wheel with the bad tire. However, it turns out that they are are different. The good tire is a tubeless one, and in order to exchange it, I was going to have to figure out how to remove and re-insert the valve.

After failing miserably at that, I called around and learned that not too many places carry replacement wheelbarrow tires. Sure, they can order them, but it takes days, and who's got that sort of time. I finally found on in Norwich, and it was a chore getting out there, but at least I got the new tire.

The wheelbarrow is up and running and working just fine... for now. Wheel see how it handles 7 cords of wood.

Until then, thanks for reading.

Monday, September 20, 2010

Firewood and Making Up For Lost Time

About two days ago I started moving and splitting firewood for the first time in what seems like months. Our entire Summer has been dominated by dumplings, so much so that I have truly neglected all other aspects of our lives. That's just not right.

With Fall pretty much here and Winter on the horizon, I need to get back to work. Fortunately we have most if not all of this Winter's wood stacked and drying (for a year), but my goal has always been to have 2 years worth seasoning. I'm now hoping to get that second year stacked and covered before the snow comes, but we'll see how that goes. Fortunately, it's cooled off a lot and the situation is not desperate. The disadvantage of those kinds of situations is that I tend to ignore them.

Anyway, I started splitting wood in earnest a few days ago, and it sure felt good to be outside and working like a real man (in training), especially when tangible things are being done. Best of all, N likes to join in or help out, A to a lesser degree, and it makes for a nice time. While they cannot handle the maul, which I can barely handle, they are both excellent at splitting kindling with a small hatchet, and they love to help me stack the wood. I love when they help me, and unlike making dumplings, it's not stressful and doesn't fill me with despair.

We are about 20% done, thanks also the efforts of my father-in-law RR, who did a stand up job when he was here. I think we're in pretty good shape, but before you know it, Winter will be here and that stack will begin to shrink faster than you can imagine.

Until the next time, thanks for reading.

Milking PR for Advice

My in-laws came for a visit, and though it was too short (you have to take what you can get), I was able to milk PR for building advice. He's the guy piloting that plane. Man that guy is a fountain of knowledge, and he speaks with such conviction, he makes you feel like you can do anything. Actually doing them is another issue.

Either way, I able to get some insight into the front step as well as how to frame the window and install the new track lights. He also gave me a thumbs up on the framing work that JH and I did on the front door, and said the barn was coming along just fine.

I feel like a real-man already.

Of course, now that they are gone, all of these projects are languishing, but at least I'm confident (delusional, perhaps?) that they will get done, and even this year.

Until then, thanks for reading.

Good Wheelbarrow Advice from RR

I was all ready to go out and buy a new wheelbarrow when my father in-law RR gave me some great advice. The problem is that our wheelbarrow takes a beating, we really put that thing to the test. I use it all the time to haul firewood, but also big blocks of wood that need to be split. There are times when I'm sure there several hundred pounds in that thing, which makes it a challenge to move.

The steel bed has become a bit warped from all that usage, and the bottom rubs against the wheel. As you can imagine, this is not a good thing. I could beat the metal back in place, that seems counterproductive, and I contacted the hardware store where I'd purchased it and they indicated that you can't replace the bed.

So I was left with getting a new one. This was not a bad plan, because the old one that we use in the garden to haul weeds completely fell apart. I was going to simply replace the old with the less-old one, and get a new one for hauling wood.

However, RR mentioned that I could just shim the handles, thereby lifting the bed enough to give the wheel more clearance. Wow, sheer genius. They always say, before beginning any project, spend some time doing nothing other than looking at the situation. From this, ideas will come. I should learn to do this more often.

Now I don't need to get a new wheelbarrow, though I still have to deal with the really old one. Like I need another project? Until the next time, thanks for reading.
I

Thursday, September 16, 2010

Serendipitous Window and Mirror Issues

Of course I can't do a job around here without some level of drama, even though that is never my goal. Everything seems so logical and straightforward, and then when I try to pull it off, complications ensue, and ones that I can never foresee.

First off, I couldn't get the new pane of glass installed because it was going to take too long. The guy on the phone said it would be no problem, there were guys on duty and if I just brought it in, they would be able to finish it in about half an hour. When I got there, the guy was busy and said it would take about 3-4 hours! They were swamped and only one guy was on duty.

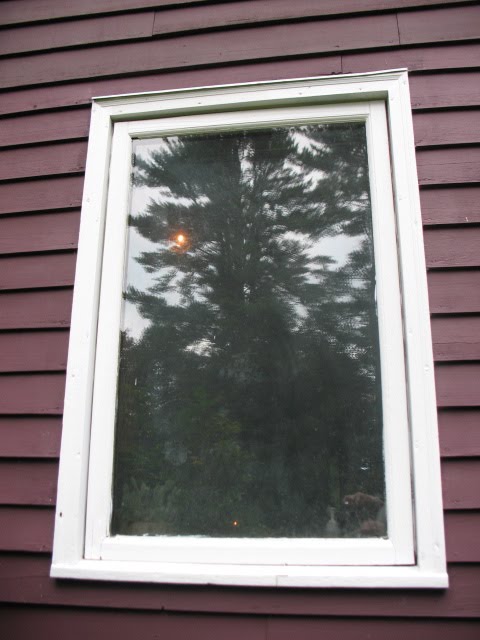
I was bummed. This wasn't what I was told. I said to just give me the window and I'd find someone to help me install it. (Boy, I sure showed them) What makes it all difficult is that I have to remove the window, which is about 3X2 feet), bring it to the store, have them replace it, and then take it home. Now I was going to have to carry the old window, new pane of glass, and a mirror home, then install the old window back in until they had time to fix it. The reason for is because it is getting cold outside and we can't have this big opening in the wall.

Then, when they were ready, I'd have to remove the window again, take it and the new glass in, and have them install it. What a pain... no pun intended.

The original goal was to have the new window in when my in-laws visited so that they would be blown away by the nice clear view, but that wasn't going to happen. This turned out to be fortuitous, however, because after my brother in-law PR took a look at it, he said it would be easy to replace, and that we/I could do it myself, no problem. That is, of course, if you were Bob Vila, or JH and his magic bag of tools. Truth be told, I do think I can do it, and think it was serendipitous that it didn't work out with Portland Glass, because now I can tackle it myself, thus adding to my real-man status.

There was also some issue with the mirror, and I'm not quite sure how to handle it. I went in wanting a simple cut piece of glass, and the guy ordered a nicer beveled piece. I didn't initially want beveled glass, but figured why not? It was a bit more expensive, and he had to special order it rather than simply cut it in the store. I should have just said, "No, I don't want beveled glass," but I just stood there like an idiot.

When the mirror came in, if you can believe this, it wasn't beveled. The question now became, am I being charged for beveled glass? If not, why did I have to pay more for a special order when they could have simply cut it there, saving me $10-15?

Again, I'm not quite sure how much of a stink I should make. I'm assuming the glass really cost the amount I paid, the question is, could I have paid less? I'm assuming the guy who ordered the glass made a mistake and forgot to order the bevel, which is not a huge deal because I didn't want it in the first place, but then why do I have to pay more for his mistake?

I'll have to brew on this one. On the one hand, I feel I should just drop it, but on the other, I'm sort of being penalized for something I didn't do.

Until the next time, thanks for reading.

Creating Pitch on the FEBP

In all of our excitement over getting that door moved, I've forgotten that our project has a name: the FEBP, for front end beautification project. How could I not remember that?

The goal here is to create the proper pitch so as to discourage water from collecting on the step and thereby flooding into the basement. Since we've eliminated most of the surface area, we've made a huge step in the right direction, but there is always more work to be done.

I need to lay a piece of plywood over the cement board, shim it, and then lay plywood over the shims. Over that plywood I'll I&W shield, then decking over that.

It's sounds fairly simple and seems like something I could do in a day, but as always, there are other things to be dealt with in life that stand in the way, like living our lives! Either way, I need to get it done before the rain/snow comes, so I'm thinking I should put it high on the priority list.

That way, once I get the plywood down, I can ignore it for another year and earn the wrath of R, as well as the disapproval of my Mentor and my in-laws, not to mention JH. How's that for a clean sweep?

Until then, thanks for reading.

Sour Grapes

After watching the chimney sweeps come and clean the flue, I came away from it kicking myself a bit thinking that I could have done it, after all. You pay these guys to come out and do about 30 minutes of work, when in fact, it's doable, I just need to man-up to the task. It's a lot like rock-climbing, you just have to get over your initial fear of falling to your death.

Easier said than done, however.

Either way, the guys were cool, and now the job is done. I learned that I can do it myself if I go from the bottom, but somehow it just works better going from above. Maybe I'll just have the pros do it once a year, that is of course until I work up the courage to do it myself, and then do little bits throughout the Winter from below.

How's that for a plan?

Until the next time, thanks for reading, and thanks to Thiago Rezende for the pic.

Wednesday, September 15, 2010

Not Quite Man Enough

In a clear blow to my path towards manhood, I took a huge step back. I didn't have the "huevos" to stand on the roof and clean the chimney, though was I ever close.

I borrowed a ladder from my neighbor KJ and rigged it with pipe insulation to protect the roof and hooks to hold it up. I then extended our ladder and climbed up and hooked the other ladder over the apex of the roof. I then went through this whole rigmarole to tie a rope to the ladder and then connect it to the tree in the back so it wouldn't slide down. I also connected my harness line to a board in a window, so I wouldn't tumble down the other side.

I climbed to the top, but once I was there, I couldn't take that first step over to the other side. Besides thinking that it was steeper than I thought it would be, I was also worried that I wouldn't be able to get back onto the ladder going back down. I know, excuses, excuses, but things are different when you're thirty feet up. I think it would have helped if I was lined up with the chimney, then if I slid down, at least I would have hit that.

Either way, I bailed. I decided to head back down and call a Tom Cady, the chimney sweep. This may sound like justification, but when I called them and hoped for a quick appointment, at least before our company arrived, they said they could come the next day because they had a cancellation.

A sign, perhaps, or simply explaining away my inadequacies? Whatever be the case, I'm hoping the chimney will get cleaned.

Until the next time, thanks for reading.

Slow as Molasses

(I know, the picture is of honey, but I couldn't find one of molasses)

Now that we finalized the big push to get the door framed and in, the project has slowed to a standstill, mainly because I am trying to figure out my next move, and also because I have no time. Then again, sometimes you just have to take it one step at a time.

The step is ready to be addressed, and the next stage will be to put on plywood, shim it, cover the shims with plywood, flash, then put on decking. Piece of cake, right?

It should only take me about a year to pull this off. In the meantime, I need to decide what sort of decking board I'm going to use. My first thought was use 2 inch maple cut from our land, but I'm thinking that may be too thick, so I'm going to use 1 inch hardwood. There, how's that for decision-making.

Until the next time, thanks for reading, and thanks to Ehsan Namavar for the pic.

Saturday, September 11, 2010

Planning the Next Step

Now that the door is in and framed, the process of sealing up the seams and eventually creating the foundation for the step must now begin. My plan is to caulk and use expanding foam to prevent drafts, and then flash at the bottom of the door.

The next big decision is what sort of decking/flooring to use on the step. First I'll have to shim it properly to get the right pitch, then flash and waterproof the thing before putting on the final covering.

Since it's only one step, I feel like we could use just about anything and even it's expensive, it isn't a lot of material. I'd like to use some sort of hard wood, like oak, and then just protect it with decking stain.

Ideally, we could use a maple board cut from the tree cut on our land, but my friend with the mill has been noticeably absent, and once again highlights the difficulties one must face when asking for favors. Things don't always work out like you plan them.

Oh well, such is life. Until the next time, thanks for reading.

Friday, September 10, 2010

Casement Window

Please excuse my absence, we've been wrapping up the dumplings operation, no pun intended.

There has been this home improvement issue that has been bothering me, and as usual, I've dealt with it by ignoring it and hoping it will go away, which of course, it never does, especially in this instance.

We have a beautiful casement window by our kitchen sink, and it looks as if it was custom made, a fact I arrived at because I can't see any writing on the window indicating a company name, and MG, the previous owner, had woodworking in her blood. Her father I believe was a cabinet maker, and there are touches all around this house where you can see the hand of experience at work.

Either way, our window has been cloudy from day 1, a fact the inspector pointed out. The stain is between the two plates, so it can't be cleaned. Also, it means the seal is gone and no longer keeps out the cold as effectively.

I assumed that it would require some glass expert to come out, remove the window, and replace the glass. That is, of course, until I met JH and his magic bag of tools. I should have known that it was doable, but it took JH to come in and actually show me how to do it. I think his strength (one of many) lies in his ability to patiently stand back, assess and situation, and then formulate a plan. After looking at the window for a bit, he figured out what to do, and it wasn't that difficult.

Since he was on the cusp of taking his trip, he had things to organize, so he had to go. Now I had this massive window that needed a new plate of glass, and then the issue of putting the thing back in. He said he'd be willing to come over in the afternoon to help replace it, so with this knowledge, I felt empowered.

I took the window over to Portland glass and they measured it and said it would take a few days. I also ordered a mirror for our downstairs bathroom, another issue that has been bugging me for a couple of years, and then I brought the window home and confronted the issue of putting it back in.

My first thought was to just wait for JH, but after looking at the window, I decided to give it a go. Sure enough I got the thing back in, and didn't end up breaking it. Amazing.

Just goes to show you, you never know what you can do until you try... or at least until JH shows you how.

Until the next time, thanks for reading.

More Good Friends

We had one or two trees that had been cut down behind the barn, and our neighbor, who happens to be a logger, said he'd take them and mill them into boards. That was a year ago, and he never came to get them. I even called him and he never got back to me. Bummer.

Luckily, the husband of the local market manager is one of the typical Vermont men who can do any and all things involving tools. Not only does this guy have his own mill, which he built, but he's got a backhoe and a truck. He came over (when he said he would), checked out the logs, and said he'd be happy to come over, drag them out, and mill them into wood. His name is CI.

The guy knows everything there is to know about trees and plants, and he gave me a lesson in grafting and growing fruit trees, which we'd like to do. He also offered to help me cut down some pines and clear some space for hardwood trees (maples, oaks, and ash) to grow, which I'd like

I also asked him to mill the maple into 2X12 boards, which I'd like to use for the front door step of our house, as well as for countertops on the new barn, and maybe a table or island top. We'll see. It would be even cooler since the wood was cut from the property. For whatever reason I kind of like that idea.

Until the next time, thanks for reading, and thanks to John Nyberg for the pic.

Wednesday, September 8, 2010

Installing the Door

In a testament to human fortitude and determination (or rather the miracle of JH's magic bag of tools), we managed to get the door in, and not a day too soon. The weather is getting cool.

JH really came through because he came over on Tuesday, which is earlier than usual, but he may have sensed an air of desperation in my voice because I needed to get that door in before it got too cold.

Whatever be the case, he came over after his work and we went to work. Because it was late, at some point we needed to work by night light, but by that point, most of the work had been done.

I will say this, getting that thing in was a lot easier than getting it out. You begin to realize why S&MG did things the way they did, and having not emulated their ways, it could very well come back to haunt us, but what else is new? Afterward we had some food with, of course, a beer. What else would a real man in training (RMIT) do?

It sure felt good to get that thing in, and yet another example of taking on a project that was incredibly daunting and intimidating, but growing by leaps and bounds from having gone for it. The alternative would have been to hire someone to do it and simply be an observer. This is not acceptable for a RMIT, and a good lesson to apply to life as a whole, not just building.

Now I've got to seal the cracks, then work on that step, but let me bask for a moment in the warm glow of accomplishment... okay, I'm finished.

When you're a RMIT, you savor these moments. Until the next time, thanks for reading.

Sunday, September 5, 2010

Framing and Sheating

I spent the greater part of last Saturday framing and sheathing the front door, which of course meant NO DUMPLINGS. Amazing how a little piece of food can eat up (no pun intended) so much of your time. Anyway, it went okay, even though I was all by my lonesome.

JH and I put up the header and framed the door and windows, and then it was up to me to get the sheathing and Tyvek up. Thankfully I had sheathing and Tyvek left over from the barn.

One the windows and doors are in, I'll need to weatherize the seams, then put in siding, but that may not happen until next year. Of course, if I follow that time frame, I'll be sleeping in the barn. The goal is to get it done ASAP, but we'll see how that goes.

Saturday, September 4, 2010

Let's Not Forget About Dormers

I can't forget about the dormers. I've finished replacing the clapboards and siding, not to mention caulking the vertical seams, and now I can paint. I should be able to get to it before the new year, but then again, you never really know.

Just a quick side note, I'd run out of clapboards and was bummed about having to get more, mainly because it's a pain going to the lumber yard, but then I found a leftover board from my previous siding excursion last year, and it was already primed.

Talk about a score.

Thanks for reading.

Frame of Mind

JH came over on Thursday and we had a power building session. It was intense, complicated by the fact that S&MG, the previous owners, were so hardcore about building that their attention to details made it that much harder to break things down. Then again, this process was also made more difficult by the fact that we wanted to save the doors and windows. It would have been much easier, not to mention faster, if we could have just ripped everything out and bought new stuff.

With greater challenge comes greater reward, as the saying goes.

With a lot of the framing already done, we could focus on the job at hand, which was to remove that darn door. Let me tell you, on more than a number of occasions, I wanted to quit and call a contractor, it was that hard. Now I'm no expert, but from past experience, I assumed you framed a RO so that it was bigger than the door, and this made it possible to lean the thing in, or out, depending upon what you're doing.

This RO was tight to the door, almost as if they set the door in and then built the frame around it so that there was no space. I couldn't believe it. Again, if we could have simply knocked the thing out with a sledge hammer, it would have been much simpler. Also, because it was so hard to remove, I assumed it had been nailed in on the top and the bottom, which is unorthodox, but you never know.

It turns out that was not the case, it was just in tight. We ended up spending about 2 hours essentially tapping the door out, millimeter by millimeter. When we finally liberated it and the door frame popped out, I felt like I'd just given birth. I think JH and I bruised each other's backs from patting them so much.

However, it wasn't over yet. We now had to remove the side windows. Again, these things were so tightly installed that I swear they framed them after installing them. Then again, that's what they invented Sawzalls for. We basically cut and pounded out the framing to get that thing out. To add to the challenge, they used some sort of industrial strength glue to hold the thing in, which we had to rip out.

By the time we had removed everything, 8 hours had passed. BTW, kudos to A&N for being so patient and not making a stink about being holed up at home while we worked. To aggravate the situation, it was one of the hottest days on record, but we were working in the shade.

We slid the door into the newly framed RO, and it practically brought a tear to my eye. I really wanted R to see it so that she wouldn't think I'm a total loser when it comes to home improvement, but it may be too late for that. Whatever be the case, we had to remove the door (more tears to my eyes) because we can't install the thing until the sheathing is up and it's covered with housewrap (i.e., Tyvek). Such is life.

At least we've tasted the fruits of our labors, and for now, that will do.

Until the next time, thanks for reading.

Wednesday, September 1, 2010

Search for Studs

Searching for studs, the story of my life. We need to secure the frame to the joists, but the question becomes, how to find the ceiling joists. Actually, the ceiling boards are nailed to something, which I would assume are the joists, but can I be sure?

Enter modern technology. I went to Home Depot, feeling more and more like a real-man, of course, and bought a stud finder. I had one which stopped working, and when it did work, only worked on drywall. I needed something a bit more serious, and found one with a "deep-stud" function. How cool is that?

The minute I got it home, N wasted no time in opening it and figuring out how it worked. You could hear the beeping of the detector throughout the house as he experimented with its sensitivity. I then set about installing the frame.

I first installed a second PT sill plate over the first, then had to decide how to install the studs. Should I go perpendicular to the sill, or flush with the wall, which is at an angle. I went with the latter, which brought up question #2. Should I place the second stud flush with the first stud, or should I space them apart? This is complicated by the fact that the first stud is at an angle, and the second stud will be directly perpendicular to the sill (see pics for some insight into this).

This time, I opted for the former. My thinking was that I would put the second stud right next to the first and then fill the small gap with expanding foam. Then I'll stuff insulation into the gap before nailing the sheathing. How's that for a plan?

With the studs and the top plate secured, I then screwed the top plate into the joists, which I could now find with my "bionic" stud finder, which worked beautifully.

With the outer frame in place, I could now set about framing the door and side windows. I measured the entire span of the door/windows and then marked off that amount of space on the new frame. My plan was to work within these boundaries to frame in the door, and then await the arrival of Bob Vila's doppelganger, JH, to actually move the door and windows. This should be good.

I did not secure the door studs for fear of making a mistake. Then again, that's the beauty of framing. If you make a mistake, simply break out the sledge hammer and fix-away. I love that.

At the very least, I'll discuss with JH on the optimal placement of the door/studs. He's much better at taking careful measurements, not to mention being organized and cleaning up after himself.

Until the next time, thanks for reading.

Nature Consultant and Funny Coincidence

We have this large bush growing in our backyard that is reaching gargantuan proportions. I've never really quite seen anything like it, and because it is isolated and has a rather planned look to it, I assumed it was planted by the previous owners and has a decorative purpose.

Not so, say my wife and kids. It's a weed, they say, and needs to be taken care of. I was more reluctant to embrace this view, so knowing that we have a resident nature guru in our community (the depth of her knowledge is amazing), I had A cut off a branch, with the berries, and bring it to the market for MH to look at.

Sure enough, she knew right off the bat what it was: pokeweed, or poke berries. The produce these beautiful purplish black berries in the Fall. MH even went into the library and checked out a book on the subject for us. How's that for service?

According to the book, the plant is considered a weed in this country, but in England, it is coveted in gardens. So the question is, what should we do with it?

I've always found it rather interesting, but it is getting enormous.

Also, in a funny coincidence, AA came to the market with a branch of a plant she couldn't identify that she'd found on the trail. Sure enough, it was pokeweed, as well. MH sent her over to our booth to share in the wonders of the coincidence.

Until the next time, thanks for reading, and thanks to PALMER W. COOK for the pic.